Easy Cherries in the Snow Dessert Recipe
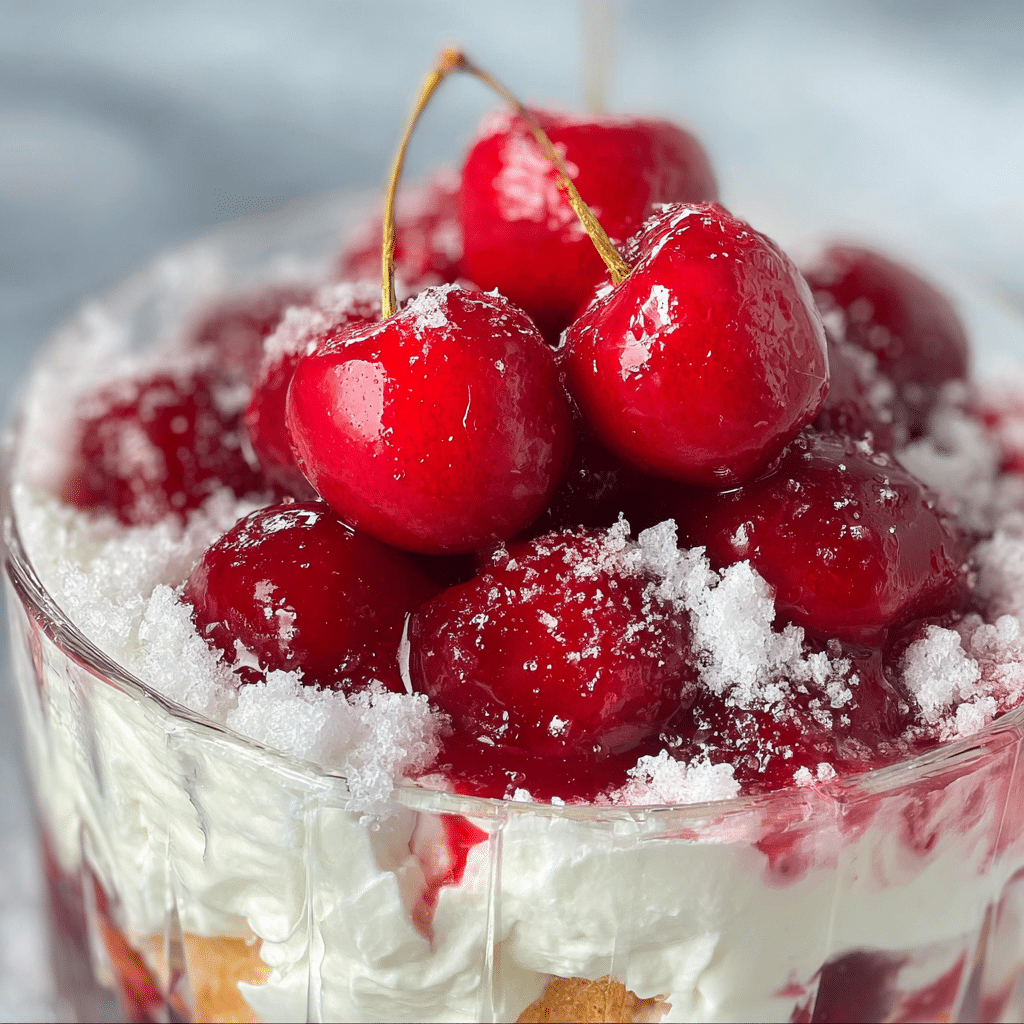
If you have a sweet tooth and a love for something creamy yet fruity, this Easy Cherries in the Snow Dessert recipe is going to become your new favorite. It’s the perfect blend of luscious cherries nestled in a fluffy, smooth cream that’s as delightful to the eyes as it is to the palate. This dessert is incredibly simple to whip up, requires no baking, and is perfect for any occasion, whether a cozy night in or a festive gathering with friends and family.
Why You’ll Love This Recipe
- Effortless preparation: Minimal ingredients and no baking time make this recipe quick and hassle-free.
- Delicious layering: The contrast between the sweet cherries and creamy base creates an irresistible flavor combo.
- Versatile serving options: Serve it chilled in bowls, glasses, or even as a cake topping.
- Visual appeal: The bright cherries against the white creamy layer look stunning and inviting.
- Perfect for any occasion: Whether it’s a holiday treat or an everyday indulgence, it fits right in.
Ingredients You’ll Need
Getting the perfect Cherries in the Snow Dessert starts with simple, fresh ingredients that each build the layers of flavor and texture. From creamy dairy to sweet cherries, every ingredient plays an essential role.
- Fresh or canned cherries: Choose ripe, juicy cherries for the best natural sweetness and color.
- Whipped cream or heavy cream: This provides the luscious, snowy base that gives the dessert its name.
- Sweetened condensed milk: Adds sweetness and a creamy texture that binds the dessert beautifully.
- Vanilla extract: Infuses warmth and depth into the cream mixture.
- Powdered sugar: Helps stabilize the whipped cream and sweetens it just right.
- Optional nuts or coconut flakes: For added crunch and texture contrast.
Variations for Cherries in the Snow Dessert
This Cherries in the Snow Dessert is wonderfully adaptable, so feel free to tailor it to your tastes or dietary needs. Whether you want to experiment with flavors, textures, or ingredients, it’s easy to make your own twist on this classic treat.
- Chocolate Chip Delight: Fold mini chocolate chips into the cream for extra decadence.
- Dairy-Free Version: Use coconut whipped cream and dairy-free condensed milk alternatives for a vegan-friendly dessert.
- Citrus Zest: Add lemon or orange zest to the cream for a refreshing tangy lift.
- Nutty Crunch: Top with toasted almonds or pecans to introduce a satisfying crunch.
- Berry Mix: Substitute cherries with raspberries or blueberries for a different berry twist.

How to Make Cherries in the Snow Dessert
Step 1: Prepare the Cherries
Start by draining canned cherries well, or if using fresh cherries, pit and halve them. This ensures every bite bursts with juicy fruit without excess liquid diluting the cream.
Step 2: Whip the Cream
In a chilled bowl, whip your heavy cream or whipped cream with powdered sugar and vanilla extract until you get soft peaks. This fluffy base is what gives the dessert its light “snowy” texture.
Step 3: Fold in Sweetened Condensed Milk
Gently fold in the sweetened condensed milk to the whipped cream until fully combined, creating a rich, sweet cream that complements the tart cherries.
Step 4: Layer the Dessert
In your serving dish or individual glasses, alternate layers of creamy mixture and cherries, starting and ending with the cream. Layering highlights both flavor and visual appeal.
Step 5: Chill and Serve
Refrigerate the dessert for at least 2 hours to let the flavors meld and the cream firm up slightly. Serve cold for the best taste and texture.
Pro Tips for Making Cherries in the Snow Dessert
- Chill your tools: Cold bowls and beaters help the cream whip faster and fluffier.
- Don’t over-whip: Stop whipping the cream as soon as soft peaks form to avoid buttering.
- Sweetness balance: Taste and adjust sugar based on how sweet your cherries are.
- Drain well: If using canned cherries, drainage prevents watery cream layers.
- Make it ahead: It tastes even better after chilling overnight, allowing the flavors to deepen.
How to Serve Cherries in the Snow Dessert
Garnishes
Sprinkle a few whole cherries or freshly grated white chocolate on top for an elegant finishing touch that invites everyone in for a taste.
Side Dishes
This dessert pairs beautifully with a hot cup of coffee or a glass of sparkling rosé, elevating any casual or formal meal into a celebration.
Creative Ways to Present
Serve in individual mason jars, clear parfait glasses, or even as a layered trifle in a large clear bowl to showcase those beautiful snowy layers and vibrant cherries.
Make Ahead and Storage
Storing Leftovers
Keep leftover dessert covered tightly in the refrigerator and consume within 3 days for the freshest taste and texture.
Freezing
This dessert doesn’t freeze well due to the whipped cream base, which can separate and become icy when thawed; it’s best enjoyed fresh or refrigerated only.
Reheating
No reheating needed — this is a chilled dessert best served cold, straight from the fridge for maximum creamy delight.
FAQs
Can I use frozen cherries for this dessert?
Yes, but thaw and drain frozen cherries very well beforehand to avoid watery layers and preserve the dessert’s creamy texture.
Is this dessert suitable for kids?
Absolutely! It’s creamy, sweet, and visually appealing – a hit with kids and adults alike. Just watch for possible allergies to dairy or nuts if you add them.
How long does it take to prepare?
The active prep time is under 15 minutes, but allow at least 2 hours chilling time for the best results.
Can I make this dessert vegan?
Yes, substitute dairy cream with coconut whipped cream and use sweetened condensed coconut milk for a delightful vegan alternative.
What is the best way to serve this dessert?
Serve it chilled with fresh cherries on top, or alongside a hot beverage to balance the cool creaminess with warmth.
Final Thoughts
Whipping up this Easy Cherries in the Snow Dessert is like inviting a burst of sweet, creamy joy into your kitchen without any fuss. It delivers on flavor, texture, and charm each time and is sure to brighten any table you place it on. So go ahead, give it a try, and share this simple delight with your loved ones — you’ll wonder why you didn’t make it sooner!
Related Posts
- Why Chocolate Peanut Butter Dream Bars Delight
- How to Make Delicious Dr. Pepper Brownies
- Why Lemon Rhubarb Loaf with Glaze Will Delight You
Cherries in the Snow Dessert
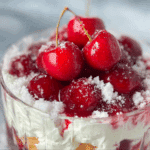
This Easy Cherries in the Snow Dessert is a creamy and fruity no-bake treat featuring luscious cherries layered in a smooth, fluffy cream base. Perfectly balanced in flavor and visually stunning, it’s quick to prepare and ideal for any occasion, from casual nights to festive gatherings.
- Prep Time: 15 mins
- Cook Time: 0 mins
- Total Time: 2 hrs 15 mins
- Yield: 6 servings 1x
- Category: Dessert
- Method: No-Bake
- Cuisine: American
- Diet: Gluten Free
Ingredients
Main Ingredients
- 1 to 2 cups fresh or canned cherries, pitted and halved if fresh
- 1 cup heavy cream or whipped cream
- 1/2 cup sweetened condensed milk
- 1 teaspoon vanilla extract
- 2 tablespoons powdered sugar
Optional Ingredients
- 1/4 cup chopped nuts (almonds, pecans) or coconut flakes for added texture
- 1/4 cup mini chocolate chips (for chocolate chip variation)
- Zest of 1 lemon or orange (for citrus zest variation)
Instructions
- Prepare the Cherries: Drain canned cherries well or, if using fresh cherries, pit and halve them to prevent excess liquid from watering down the dessert.
- Whip the Cream: In a chilled bowl, whip the heavy cream or whipped cream together with powdered sugar and vanilla extract until soft peaks form, creating a fluffy, snowy texture that forms the dessert’s base.
- Fold in Sweetened Condensed Milk: Gently fold the sweetened condensed milk into the whipped cream until fully combined, resulting in a rich and creamy mixture that balances the tartness of the cherries.
- Layer the Dessert: In your chosen serving dish or individual glasses, alternate layers of the creamy mixture and cherries, beginning and finishing with the cream to highlight both flavor and visual appeal.
- Chill and Serve: Refrigerate the assembled dessert for at least 2 hours to allow the flavors to meld and the cream to firm up slightly. Serve chilled for the best taste and texture.
Notes
- Chill your bowls and beaters to help the cream whip faster and fluffier.
- Stop whipping as soon as soft peaks form to avoid turning the cream buttery.
- Taste and adjust sugar depending on the sweetness of your cherries.
- Drain canned cherries thoroughly to keep cream layers from becoming watery.
- This dessert tastes even better if made ahead and chilled overnight.
- Frozen cherries can be used if thawed and drained well.
- For vegan versions, substitute with coconut whipped cream and dairy-free condensed milk.
- Do not freeze this dessert as the whipped cream base will separate and become icy when thawed.
Nutrition
- Serving Size: 1 serving (about 1/6 of recipe)
- Calories: 250
- Sugar: 28g
- Sodium: 45mg
- Fat: 15g
- Saturated Fat: 9g
- Unsaturated Fat: 5g
- Trans Fat: 0g
- Carbohydrates: 28g
- Fiber: 1g
- Protein: 3g
- Cholesterol: 55mg
Keywords: cherries dessert, no-bake dessert, creamy cherry dessert, chilled dessert, easy dessert