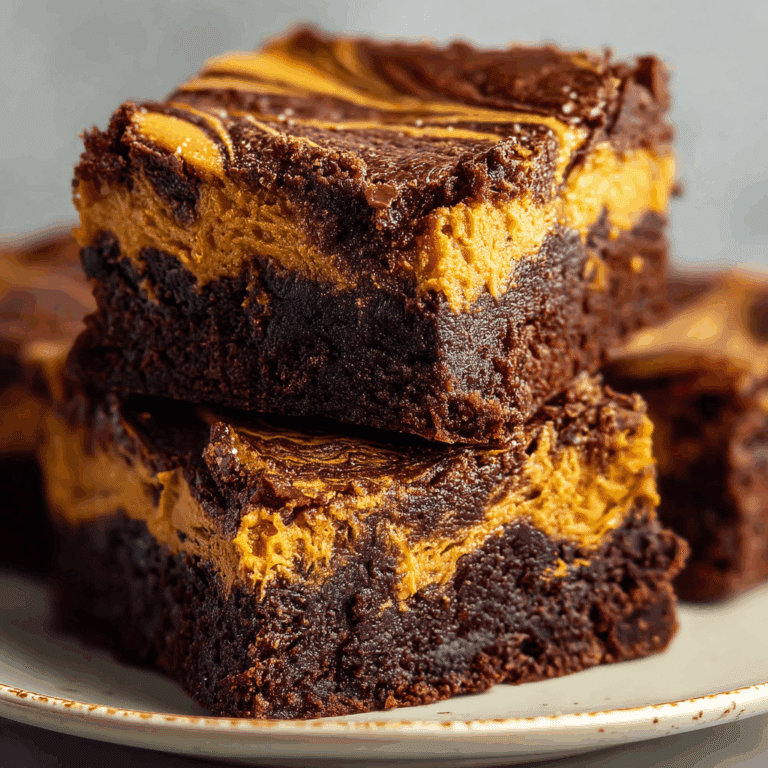
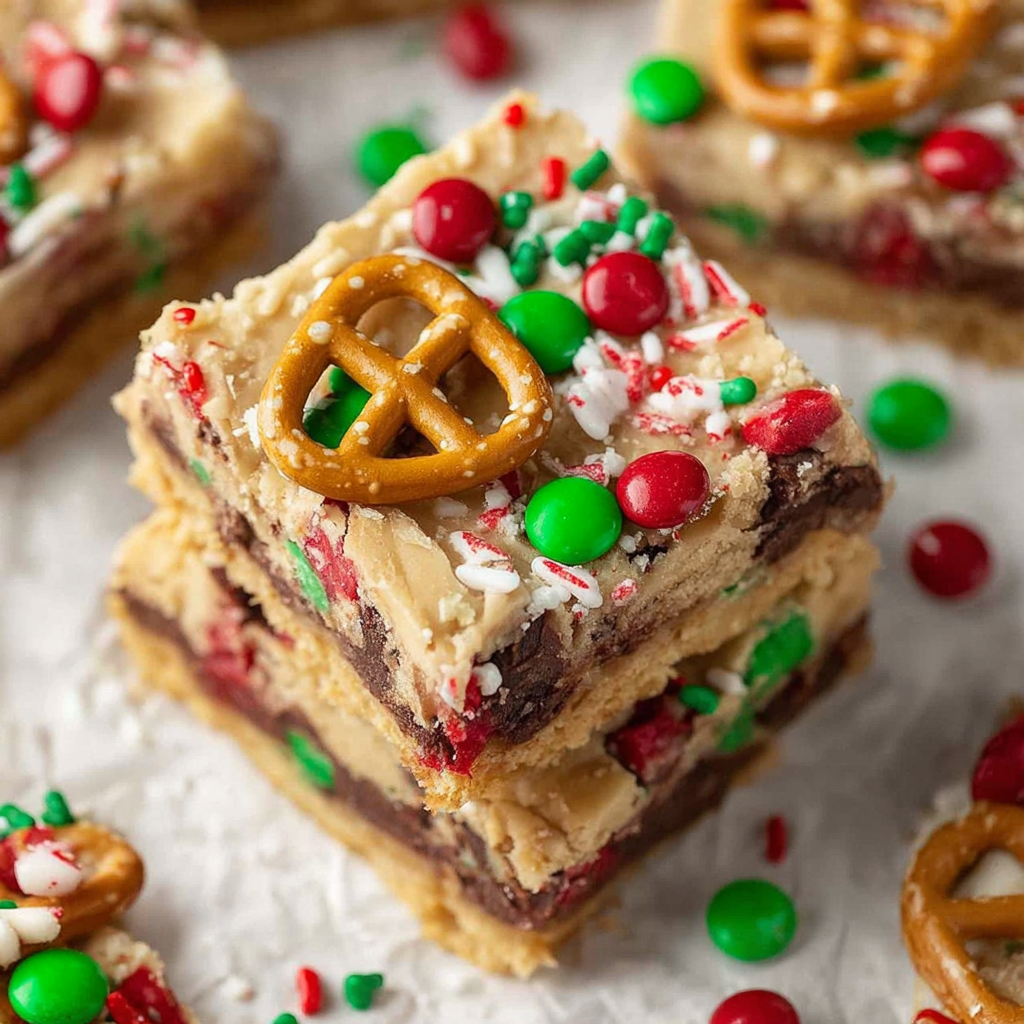
Christmas Bars

Delight your festive table with these easy Christmas Bars—quick to make, deliciously sweet, and perfect for holiday celebrations! These bars combine layers of buttery crust, gooey fillings, and festive toppings that capture the spirit of the season in every bite. Whether you’re a seasoned baker or just looking for a simple treat to share, Christmas Bars are your go-to recipe for spreading holiday cheer in the most delicious way possible.
Why You’ll Love This Recipe
- Quick and Simple: Ready in under an hour with minimal prep, perfect for busy holiday schedules.
- Festive Flavors: Combines classic holiday ingredients that evoke warmth and nostalgia.
- Customizable: Easily adapted with your favorite ingredients or dietary preferences.
- Ideal for Sharing: Bars are easy to slice, transport, and enjoy at gatherings or as gifts.
- Kids Friendly: Fun to make and loved by all ages, sparking joyful kitchen moments.
Ingredients You’ll Need
These ingredients are simple yet essential for creating Christmas Bars that balance texture and flavor beautifully. Each component plays a key role in delivering that perfect sweet, chewy, and slightly crumbly bite.
- Butter: Provides richness and a tender crumb to the crust and topping.
- Brown Sugar: Adds depth and caramel notes to enrich the sweetness.
- All-Purpose Flour: The base for your crust, giving it structure and stability.
- Chopped Nuts: Offers crunch and a toasty flavor, optional but highly recommended.
- Dried Fruits: Adds chewy bursts of sweetness and holiday color.
- Sweetened Condensed Milk: Creates a luscious, gooey layer that binds the bars.
- Vanilla Extract: Enhances the overall flavor with warm, aromatic notes.
- Mini Chocolate Chips: Adds melty pockets of chocolate for a festive touch.
Variations for Christmas Bars
Adjusting this recipe to suit your taste or dietary needs is effortless with a few creative swaps. Feel free to experiment and make these Christmas Bars truly your own.
- Nut-Free Version: Simply omit nuts and add extra dried fruit or seeds for crunch.
- Gluten-Free: Substitute all-purpose flour with a gluten-free baking blend.
- Chocolate Lover’s Twist: Add more chocolate chips or drizzle melted chocolate on top.
- Spiced Up: Incorporate cinnamon, nutmeg, or ginger to evoke classic holiday spices.
- Vegan Option: Replace butter with coconut oil and use dairy-free condensed milk alternatives.
How to Make Christmas Bars
Step 1: Prepare the Crust
Start by preheating your oven and lining your baking pan with parchment paper. Mix melted butter with brown sugar and flour until crumbly, then press half this mixture firmly into the bottom of the pan to form the base of your bars.
Step 2: Add the Filling
Sprinkle chopped nuts, dried fruits, and mini chocolate chips evenly over the crust. Pour sweetened condensed milk over the top to bind all the ingredients together, creating that signature gooey layer.
Step 3: Top and Bake
Sprinkle the remaining crumb mixture over the filling layer, distributing it as evenly as possible. Bake in the preheated oven until the top is golden brown and the bars are set, typically around 25 to 30 minutes.
Step 4: Cool and Slice
Allow the bars to cool completely before slicing into squares or rectangles. This cooling step helps the bars set perfectly so they hold their shape without crumbling.
Pro Tips for Making Christmas Bars
- Use Room Temperature Butter: Helps mix ingredients evenly for a smooth crust texture.
- Don’t Skip Parchment Paper: Makes removing the bars a breeze and keeps edges clean.
- Press Crust Firmly: Prevents the base from falling apart when cut.
- Even Topping Distribution: Ensures every bite has a perfect balance of nuts, fruit, and sweetness.
- Let Bars Fully Cool: Guarantees clean slices and the gooey center sets just right.
How to Serve Christmas Bars
Garnishes
Top your Christmas Bars with a dusting of powdered sugar or drizzle melted chocolate for an elegant finish that boosts both presentation and taste. Fresh cranberries or a sprinkle of chopped pistachios add festive pops of color and texture.
Side Dishes
Serve these bars alongside hot beverages like spiced cider, coffee, or eggnog to complement the rich, sweet flavors. They also pair well with a simple scoop of vanilla ice cream for a cozy dessert treat.
Creative Ways to Present
Cut the bars into bite-sized pieces and arrange them in festive holiday tins or clear glass jars, perfect for gifting or making your dessert table eye-catching. Alternatively, stack bars with parchment paper between layers for an easy grab-and-go holiday snack.
Make Ahead and Storage
Storing Leftovers
Christmas Bars keep beautifully in an airtight container at room temperature for up to five days, making them a convenient treat to enjoy throughout the holiday season.
Freezing
Wrap individual bars tightly in plastic wrap and place them in a freezer-safe container to freeze for up to three months. Thaw at room temperature when ready to enjoy.
Reheating
If you prefer your Christmas Bars warm, reheat them gently in a microwave or oven for a few seconds to restore their soft, gooey texture without drying them out.
FAQs
Can I use different types of dried fruit in Christmas Bars?
Absolutely! Feel free to mix and match your favorites, like raisins, cranberries, cherries, or apricots, to customize flavor and texture.
Are Christmas Bars gluten-free?
They can be! Simply swap the all-purpose flour for a gluten-free baking blend and ensure all other ingredients are gluten-free certified.
How long do Christmas Bars last?
Stored properly at room temperature in an airtight container, they last up to five days, and they can be frozen for longer storage.
Can I make Christmas Bars vegan?
Yes! Use vegan butter or coconut oil and replace sweetened condensed milk with a plant-based alternative to keep the bars dairy-free.
What is the best way to cut Christmas Bars?
Using a sharp knife after the bars have fully cooled will give you clean edges; warm the knife slightly for easier slicing.
Final Thoughts
If you’re looking to add a sweet, nostalgic touch to your holiday baking, these easy Christmas Bars are a must-try. They are as simple as they are delicious and bring the warmth and joy of the season right to your kitchen. Gather your ingredients, invite a few friends or family members, and enjoy the magic of making your holiday celebrations even sweeter!
Related Posts
PrintChristmas Bars

Delight your festive table with these easy Christmas Bars—quick to make, deliciously sweet, and perfect for holiday celebrations! Featuring layers of buttery crust, gooey fillings, and festive toppings, these bars capture the spirit of the season with classic holiday flavors. Ideal for sharing, customizable for dietary preferences, and fun for all ages, they bring warmth and joy to your holiday baking repertoire.
- Prep Time: 15 minutes
- Cook Time: 30 minutes
- Total Time: 45 minutes
- Yield: 16 bars 1x
- Category: Dessert
- Method: Baking
- Cuisine: American
- Diet: Gluten Free (with substitution)
Ingredients
Crust & Topping
- 1 cup (2 sticks) unsalted butter, melted (room temperature recommended)
- 1 cup brown sugar
- 2 cups all-purpose flour (or gluten-free baking blend for gluten-free)
Filling
- 1 cup chopped nuts (optional but recommended; can omit for nut-free)
- 1 cup mixed dried fruits (raisins, cranberries, cherries, apricots preferred)
- 1 cup mini chocolate chips
- 1 can (14 oz) sweetened condensed milk (use dairy-free alternative for vegan option)
- 1 teaspoon vanilla extract
Instructions
- Prepare the Crust: Preheat your oven to 350°F (175°C) and line a baking pan (9×13 inch recommended) with parchment paper. In a bowl, mix the melted butter, brown sugar, and flour until the mixture is crumbly. Press half of this crumbly mixture firmly into the bottom of the pan to form the crust base.
- Add the Filling: Evenly sprinkle the chopped nuts, dried fruits, and mini chocolate chips over the crust. Pour the sweetened condensed milk evenly over the top to bind all the ingredients and create a luscious, gooey layer. Add the vanilla extract as part of the sweetened condensed milk pour or mixed beforehand.
- Top and Bake: Sprinkle the remaining crumb mixture evenly over the filling layer, covering the top as uniformly as possible. Bake in the preheated oven for 25 to 30 minutes, or until the top turns golden brown and the bars are set.
- Cool and Slice: Allow the bars to cool completely in the pan before slicing into squares or rectangles. This step ensures the bars hold their shape and slice cleanly without crumbling.
Notes
- Use room temperature butter to ensure even mixing and a smooth crust texture.
- Line your baking pan with parchment paper to easily remove bars and keep edges clean.
- Press the crust firmly to prevent the base from falling apart when cutting.
- Distribute the nuts, fruit, and chocolate chips evenly for a balanced flavor in every bite.
- Let the bars cool completely for clean slicing and perfect gooey centers.
- For nut-free versions, omit nuts and add extra dried fruits or seeds for crunch.
- To make gluten-free, substitute all-purpose flour with a gluten-free baking blend.
- Vegan options: replace butter with coconut oil and use plant-based condensed milk alternatives.
- Add holiday spices like cinnamon, nutmeg, or ginger for an extra festive twist.
Nutrition
- Serving Size: 1 bar
- Calories: 250 kcal
- Sugar: 20 g
- Sodium: 100 mg
- Fat: 12 g
- Saturated Fat: 7 g
- Unsaturated Fat: 4 g
- Trans Fat: 0 g
- Carbohydrates: 32 g
- Fiber: 2 g
- Protein: 3 g
- Cholesterol: 35 mg
Keywords: Christmas Bars, holiday dessert, easy bars, gluten-free bars, festive treats, holiday baking, sweet bars, vegan option