How to Make Slime-Filled Halloween Cookies
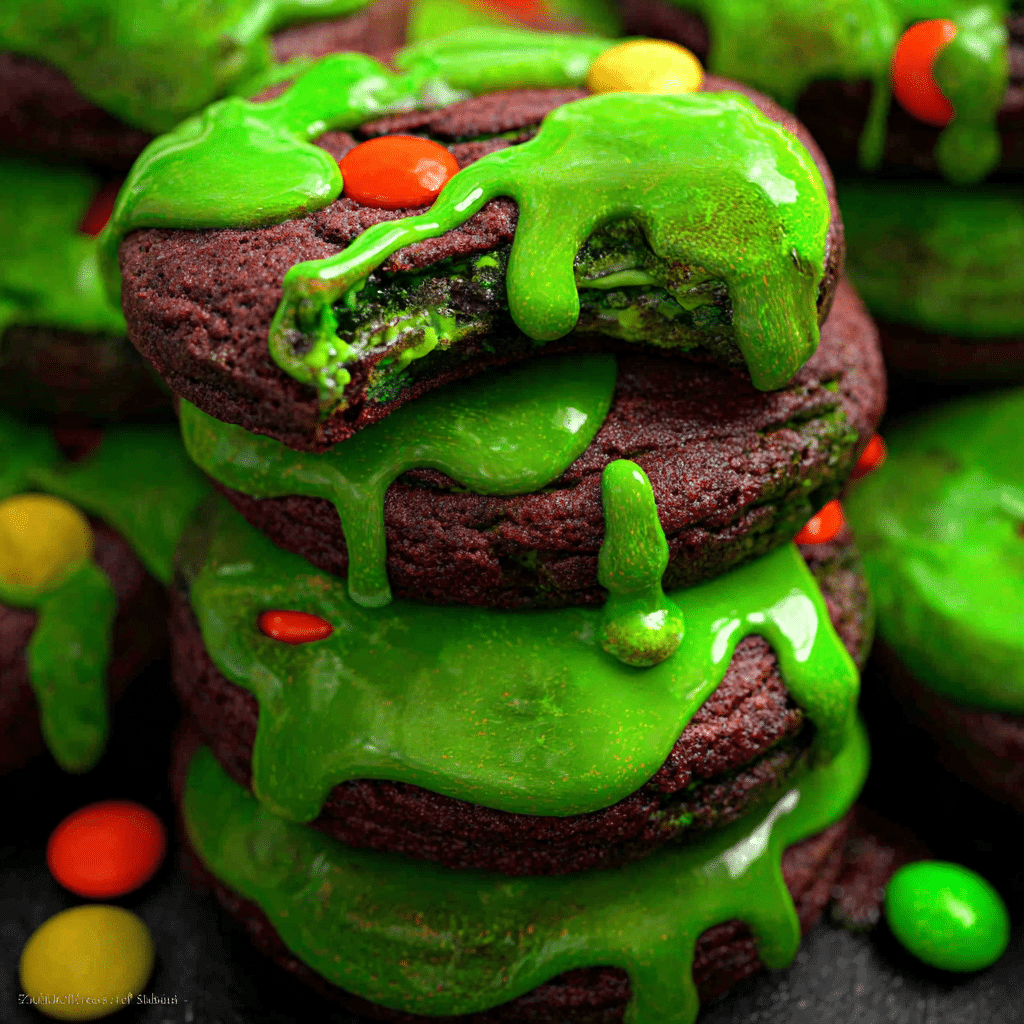
If you’re searching for a delightfully eerie and utterly delicious treat, you’ve found it: Slime-Filled Halloween Cookies! These gooey, spooky cookies bring together the perfect balance of sweet, chewy dough and a surprise slime-like center that will wow your friends and family this Halloween season. In this post, you’ll learn the step-by-step recipe to create these unforgettable cookies that combine festive fun with a touch of playful creepiness for your holiday celebrations.
Why You’ll Love This Recipe
- Fun and Surprise Factor: Each cookie hides a gooey slime center that oozes out for a spooky surprise with every bite.
- Simple Ingredients: Uses common pantry staples with a special filling that adds that magical Halloween vibe.
- Perfect for All Ages: Kids and adults alike will be enchanted by the spooky, playful twist.
- Great for Parties: These cookies make a wow-worthy addition to any Halloween party treat table.
- Customizable: Easy to tweak to your taste preference, dietary needs, or even color schemes.
Ingredients You’ll Need
Creating these Slime-Filled Halloween Cookies is straightforward, relying on a few basic ingredients that provide the perfect taste, texture, and of course, that signature slime effect. Each ingredient plays a special role in turning ordinary cookies into a spooky masterpiece.
- All-Purpose Flour: The foundation for the dough ensuring soft and chewy cookies.
- Butter: Adds richness and helps achieve the perfect melt-in-your-mouth texture.
- Sugar (Granulated and Brown): Granulated sugar adds sweetness, while brown sugar contributes moisture and depth of flavor.
- Eggs: Bind the dough together for structure and softness.
- Baking Soda: Ensures the cookies rise just enough, keeping them fluffy but sturdy.
- Vanilla Extract: Brings warmth and a touch of sweetness to enrich the dough.
- Gel Food Coloring: For that perfect slime color—think eerie green or vibrant purple.
- Fruit Jam or Jelly: The oozy slime filling that bursts out when you bite into the cookie.
- Cornstarch: Helps thicken the slime filling so it stays gooey and doesn’t leak too much.
Variations for Slime-Filled Halloween Cookies
Feel free to get creative by swapping ingredients or flavors to make these Slime-Filled Halloween Cookies uniquely yours. They’re foolproof to adapt, whether you’re catering to dietary restrictions or personal taste preferences.
- Vegan Option: Substitute butter with coconut oil and eggs with flax eggs for a plant-based treat.
- Different Flavors: Use different jams like raspberry, blackberry, or even mango for varied slime colors and tastes.
- Spiced Dough: Add pumpkin pie spice or cinnamon to your cookie dough for an autumnal twist.
- Gluten-Free: Use a gluten-free flour blend to make these cookies safe for gluten-sensitive eaters.
- Edible Glitter: Mix in some edible glitter or sprinkles on the dough for a magical, sparkling effect.

How to Make Slime-Filled Halloween Cookies
Step 1: Prepare the Dough
Start by creaming the softened butter with both sugars until light and fluffy. Beat in the eggs one at a time, then stir in the vanilla extract. In a separate bowl, whisk together the flour and baking soda. Gradually add the dry ingredients to the wet mixture, stirring until a dough forms. This base will create your soft, flavorful cookie shell.
Step 2: Make the Slime Filling
In a small saucepan, gently warm your chosen fruit jam or jelly combined with a tablespoon of cornstarch to thicken it slightly. Add a few drops of gel food coloring to create that vivid slime effect. Stir constantly until the mixture thickens and is smooth. Then let it cool so it holds its shape inside the cookies.
Step 3: Assemble the Cookies
Preheat your oven to 350°F (175°C). Roll the dough into small balls and flatten each into discs. Spoon a small amount of the slime mixture into the center of one disc, then top it with another flattened dough disc and pinch the edges together tightly to seal. This creates a gooey, slime-filled center burst during baking.
Step 4: Bake and Cool
Place the assembled cookies on a parchment-lined baking sheet, and bake for about 10 to 12 minutes or until the edges are golden but the centers are still soft. Allow the cookies to cool completely on a wire rack; the slime center will consolidate as it cools, giving you the perfect gooey texture.
Pro Tips for Making Slime-Filled Halloween Cookies
- Seal Tight: Ensure cookie edges are pressed firmly to prevent slime leakage during baking.
- Chill Dough: Refrigerate the assembled cookies for 20 minutes before baking to help them hold shape.
- Use Gel Colors: Gel food coloring gives vivid colors without altering dough consistency.
- Thicken Filling: Cornstarch in the slime filling prevents it from becoming too runny inside the cookies.
- Watch Baking Time: Slightly underbake if you want gooier cookies, but be careful not to undercook the dough.
How to Serve Slime-Filled Halloween Cookies
Garnishes
Top your cookies with a light dusting of powdered sugar for a spooky “fog” effect or drizzle thin lines of contrasting colored icing to resemble creepy veins or webs. You can also add edible eyes or Halloween-themed sprinkles to amp up that festive vibe.
Side Dishes
Serve these cookies alongside a warm cup of spiced apple cider or hot chocolate for a comforting fall combo. A small bowl of fresh berries or a citrus fruit plate can also add a refreshing contrast to the sweet, gooey cookie goodies.
Creative Ways to Present
Put your Slime-Filled Halloween Cookies on a dark or themed platter surrounded by cobweb décor or small plastic spiders for that extra creepy-cute presentation. You might even package them individually in clear bags with fun Halloween stickers as party favors that guests will love taking home.
Make Ahead and Storage
Storing Leftovers
Place your cooled cookies in an airtight container and store them at room temperature for up to 3 days. Keeping them sealed prevents the slime filling from drying out and maintains the cookie’s chewy texture.
Freezing
You can freeze these cookies either before or after baking. For best results, freeze assembled raw cookies on a baking sheet first, then transfer to a freezer bag. When ready to bake, add a couple minutes to the baking time. Baked cookies can be frozen in airtight containers for up to 1 month and thawed at room temperature.
Reheating
Warm cookies gently in the microwave for 10 to 15 seconds or in a low oven to soften the dough and revive the gooey slime center. Avoid overheating to prevent the slime from becoming too liquid or the dough drying out.
FAQs
Can I use any type of jam for the slime filling?
Yes! Most jams and jellies work well, but thicker jams like raspberry or blackberry tend to hold the slime texture better when combined with cornstarch.
How do I prevent the slime from leaking during baking?
The key is sealing the cookie edges very tightly and using a thickened slime filling with cornstarch so it doesn’t become too runny in the oven.
Are these cookies safe for kids?
Absolutely! These cookies are made with common ingredients and a fun slime surprise—just be cautious if kids have allergies, especially to nuts or eggs.
Can I make these cookies gluten-free?
Yes, simply swap the all-purpose flour with a gluten-free blend suitable for baking to create a gluten-free version.
How long do these cookies last?
Stored properly in an airtight container, they stay fresh for 3 days at room temperature or longer when frozen.
Final Thoughts
These Slime-Filled Halloween Cookies are a fantastic way to bring excitement, sweetness, and a little playful fright to your holiday gatherings. They’re easy to make, customizable, and always a crowd-pleaser. So grab your ingredients, get baking, and enjoy the smiles (and maybe a few “ewws”) as everyone discovers the gooey, spooky surprise hidden inside each cookie!
Related Posts
- Why Fruity Pebbles Cheesecake Tacos Are a Must-Try
- Why Caramel Banana Nuts Tacos Are Irresistible Treats
- Why Biscoff Truffle Bites Are Irresistible Treats
Slime-Filled Halloween Cookies
Slime-Filled Halloween Cookies are spooky, chewy cookies with a gooey, colorful slime center made from thickened fruit jam. Perfect for Halloween parties, these fun and customizable cookies combine festive flavors and a playful surprise that delights both kids and adults.
- Prep Time: 20 mins
- Cook Time: 12 mins
- Total Time: 32 mins
- Yield: 24 cookies 1x
- Category: Appetizers
- Method: Baking
- Cuisine: American
- Diet: Gluten Free (if using gluten-free flour blend)
Ingredients
Cookie Dough
- 2 ½ cups All-Purpose Flour
- 1 cup Butter, softened
- ½ cup Granulated Sugar
- ½ cup Brown Sugar, packed
- 2 Eggs
- 1 teaspoon Baking Soda
- 1 teaspoon Vanilla Extract
Slime Filling
- ¾ cup Fruit Jam or Jelly (raspberry, blackberry, or mango recommended)
- 1 tablespoon Cornstarch
- Gel Food Coloring (green, purple, or desired slime color)
Instructions
- Prepare the Dough: Start by creaming the softened butter with both granulated and brown sugars until light and fluffy. Beat in the eggs one at a time, then stir in the vanilla extract. In a separate bowl, whisk together the all-purpose flour and baking soda. Gradually add the dry ingredients to the wet mixture, stirring until a soft dough forms.
- Make the Slime Filling: In a small saucepan, gently warm your chosen fruit jam combined with cornstarch to thicken it slightly. Add a few drops of gel food coloring to create the vivid slime effect. Stir constantly over low heat until the mixture thickens and becomes smooth. Remove from heat and let it cool completely to hold its shape during baking.
- Assemble the Cookies: Preheat the oven to 350°F (175°C). Roll the dough into small balls and flatten each into a disc shape. Spoon a small amount of the cooled slime filling onto one disc, then cover with another dough disc. Pinch the edges tightly together to seal completely, preventing leakage during baking.
- Bake and Cool: Place the sealed cookies on a parchment-lined baking sheet. Bake for 10 to 12 minutes or until the edges are golden, but the centers remain soft. Remove from the oven and allow the cookies to cool fully on a wire rack. The slime center will set into a gooey consistency as the cookies cool.
Notes
- Seal Tight: Press cookie edges firmly to prevent slime leakage during baking.
- Chill Dough: Refrigerate assembled cookies for 20 minutes before baking to help maintain their shape.
- Use Gel Colors: Gel food coloring provides vivid colors without affecting dough consistency.
- Thicken Filling: Cornstarch is essential to keep the slime filling gooey yet stable.
- Watch Baking Time: Slightly underbake for gooier centers but avoid undercooking the dough.
Nutrition
- Serving Size: 1 cookie
- Calories: 150 kcal
- Sugar: 12 g
- Sodium: 90 mg
- Fat: 7 g
- Saturated Fat: 4 g
- Unsaturated Fat: 3 g
- Trans Fat: 0 g
- Carbohydrates: 20 g
- Fiber: 0.5 g
- Protein: 2 g
- Cholesterol: 30 mg
Keywords: Halloween cookies, slime-filled cookies, spooky treats, Halloween party snacks, gooey cookies, festive cookies, jam-filled cookies