Witch Hat Halloween Cookies
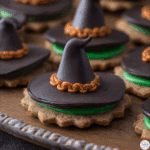
Witch Hat Halloween Cookies are a fun and festive treat perfect for Halloween celebrations. These buttery, crunchy cookies feature a charming witch hat design using simple pantry ingredients like all-purpose flour, butter, sugar, chocolate kisses, mini chocolate sandwich cookies, and colorful candy melts. Easy to make and visually stunning, these cookies delight both kids and adults with their sweet flavor and playful appearance. They are customizable for dietary needs and make great party favors or gifts.
- Prep Time: 45 minutes
- Cook Time: 12 minutes
- Total Time: 57 minutes
- Yield: 24 cookies 1x
- Category: Appetizers
- Method: Baking
- Cuisine: American
- Diet: Gluten Free Option Available
Ingredients
Scale
Cookie Base
- 2 ½ cups all-purpose flour
- 1 cup unsalted butter, softened
- ¾ cup granulated sugar
- 1 teaspoon vanilla extract
Decorations
- Chocolate kisses (one per cookie)
- Mini chocolate sandwich cookies (Oreos or similar)
- Orange or colored candy melts
Optional Add-Ins & Variations
- Gluten-free flour blend (for gluten-free option)
- Coconut oil (to replace butter for vegan version)
- Dairy-free chocolate kisses and candies (for vegan version)
- 1 teaspoon cinnamon or pumpkin spice (for flavor twists)
- Finely chopped nuts (optional)
Instructions
- Prepare the Dough: Cream together 1 cup softened unsalted butter and ¾ cup granulated sugar until the mixture is light and fluffy. Add 1 teaspoon vanilla extract, then gradually mix in 2 ½ cups all-purpose flour until a soft dough forms. Chill the dough for about 30 minutes to make it easier to handle and roll out.
- Cut Out the Cookie Bases: Roll out the chilled dough on a lightly floured surface to about 1/4 inch thickness. Using a round cookie cutter approximately 2 inches in diameter, cut out cookie circles that will represent the base of the witch hat. Place them evenly spaced on a baking sheet lined with parchment paper.
- Bake the Cookies: Bake the cookies in a preheated oven at 350°F (175°C) for about 10-12 minutes until they are just beginning to turn golden at the edges. Let the cookies cool completely to firm up before decorating.
- Assemble the Witch Hats: Once cookies are cool, unwrap the chocolate kisses and gently press one onto the center of each cookie base. Use a dab of melted candy melts or frosting to secure the candy melts as the hatband around the base of the chocolate kiss. Allow everything to set before handling.
- Add Final Decorations: Get creative with additional sprinkles or edible glitter if you like! Once the candy melts have hardened, your Witch Hat Halloween Cookies are ready to serve or pack up for gifting.
Notes
- Chill the dough well to make cutting shapes easier and prevent spreading during baking.
- Use parchment paper on the baking sheet to prevent sticking and ease cleanup.
- Work quickly with candy melts as they harden fast; have decorations ready before melting.
- Cool cookies completely before decorating to avoid melting or shifting designs.
- Store cookies in an airtight container to maintain crisp texture, separating layers with parchment paper.
Nutrition
- Serving Size: 1 cookie
- Calories: 150 kcal
- Sugar: 12 g
- Sodium: 50 mg
- Fat: 8 g
- Saturated Fat: 5 g
- Unsaturated Fat: 2.5 g
- Trans Fat: 0 g
- Carbohydrates: 18 g
- Fiber: 1 g
- Protein: 2 g
- Cholesterol: 20 mg
Keywords: Halloween cookies, witch hat cookies, festive treats, Halloween party snacks, easy cookie recipe, buttery cookies, chocolate cookies
Find it online: https://sophiemelody.com/witch-hat-halloween-cookies/
